GitHub is an online space where people can write, share, and collaborate on projects. There is a lot that programmers can do with GitHub, but you do not need to know how to code to use it! It can instead be thought of as an extension of the digital humanities-a place to store projects and files and work on them with others. Some common use examples include writing and storing programs written in the many languages GitHub supports, creating text files to describe the purpose of your project, or accessing CSV files like some of us did on the midterm. Projects can be set to “public” or “private” and can each have a unique set of collaborators, which means that they can be individual projects that no one sees, or large group efforts that can be referenced by broader communities. This is where GitHub’s true value can be seen from a DH perspective.
While there are many things that can be done with GitHub, more of which can be found on this dedicated tutorial, I will focus on basic aspects including creating a repository, creating files within it, and how collaboration can be facilitated.
Creating a Repository
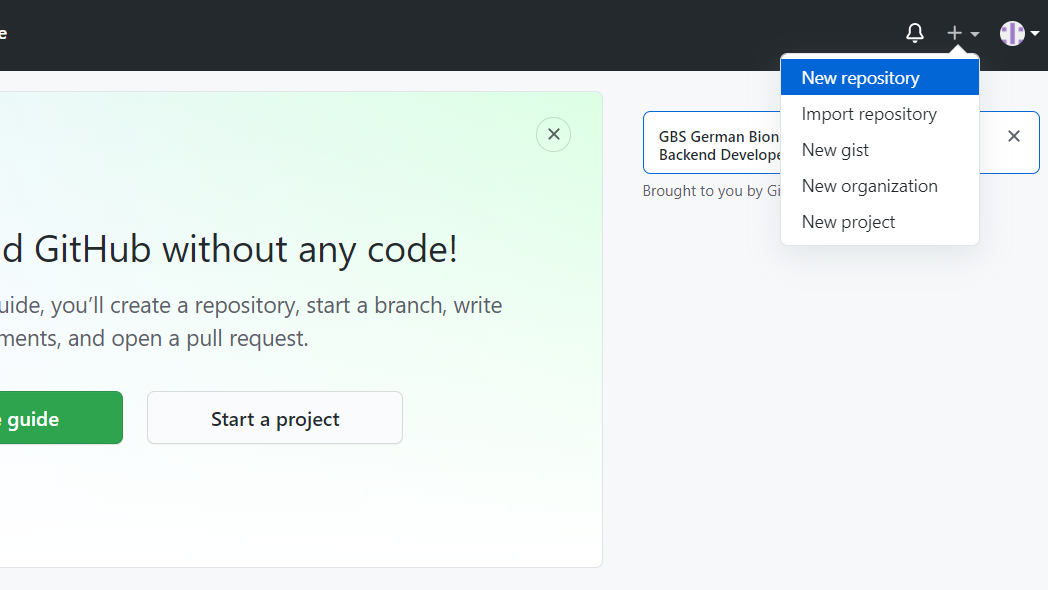
A repository at a basic level is a place to store content on GitHub. This content can include files, folders, pictures, datasets, and more. I like to think of a repository as a folder where I store all relevant content for a given project, with different repositories for different projects. To create a repository, click on the “plus” sign in the top right corner and then select “New repository”:
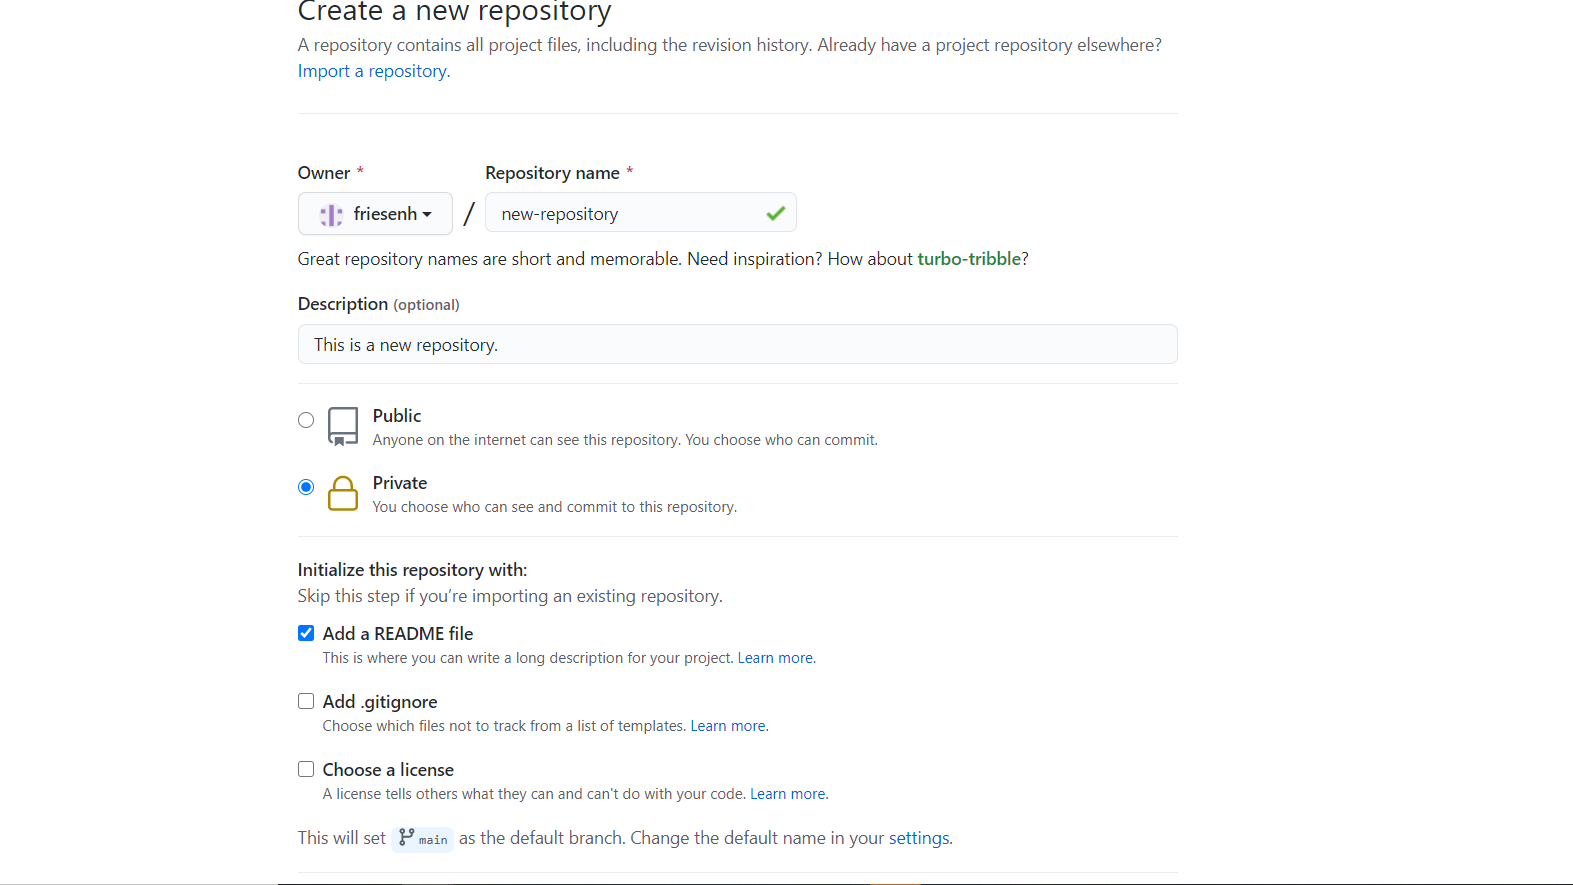
Give your repository a name and a description. Then, choose whether you want your repository to be public or private. Finally, you have options for initializing your repository with various features. One common file in many GitHub repositories is the README file, which is an optional location for you to thoroughly describe your project. You can always add this file later, but I like to add it in right away. When you’ve selected all your preferences, click the “Create repository” button at the bottom to finish.
Adding Files to Your Repository
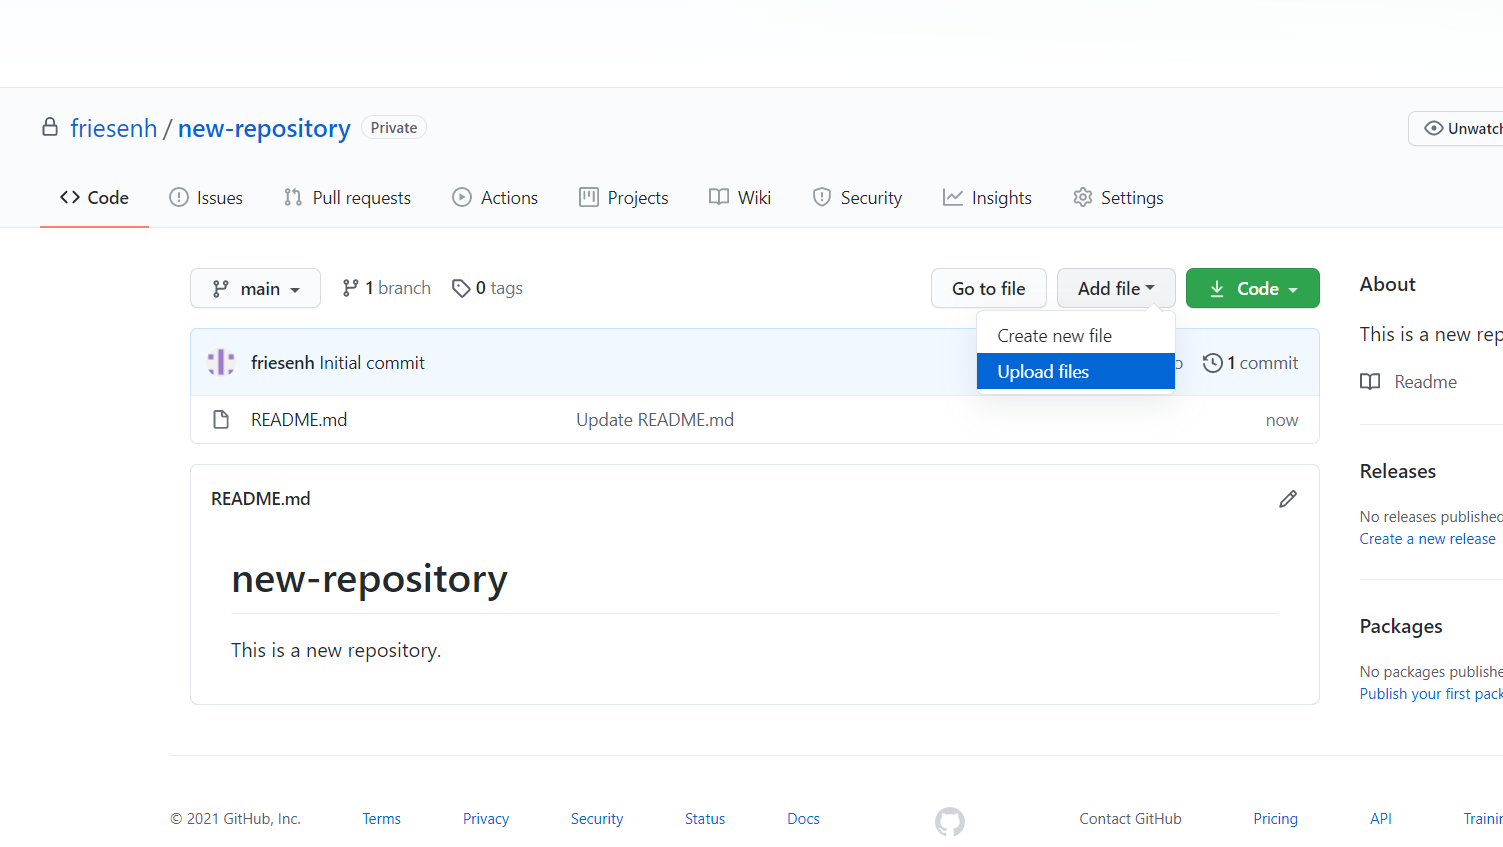
Now that you have a repository setup, you can begin to create and upload relevant files. These can include things like code, datasets, CSVs, text files, etc. To add new files, click the “Add file” dropdown menu and select whether you’d like to Create new file or Upload files. If you click Upload files, you will be taken to a screen where you can select or drop files from your computer. If you click Create new file, you will be taken to a screen where you’ll be prompted to give it a title and enter whatever you like into the given file lines.
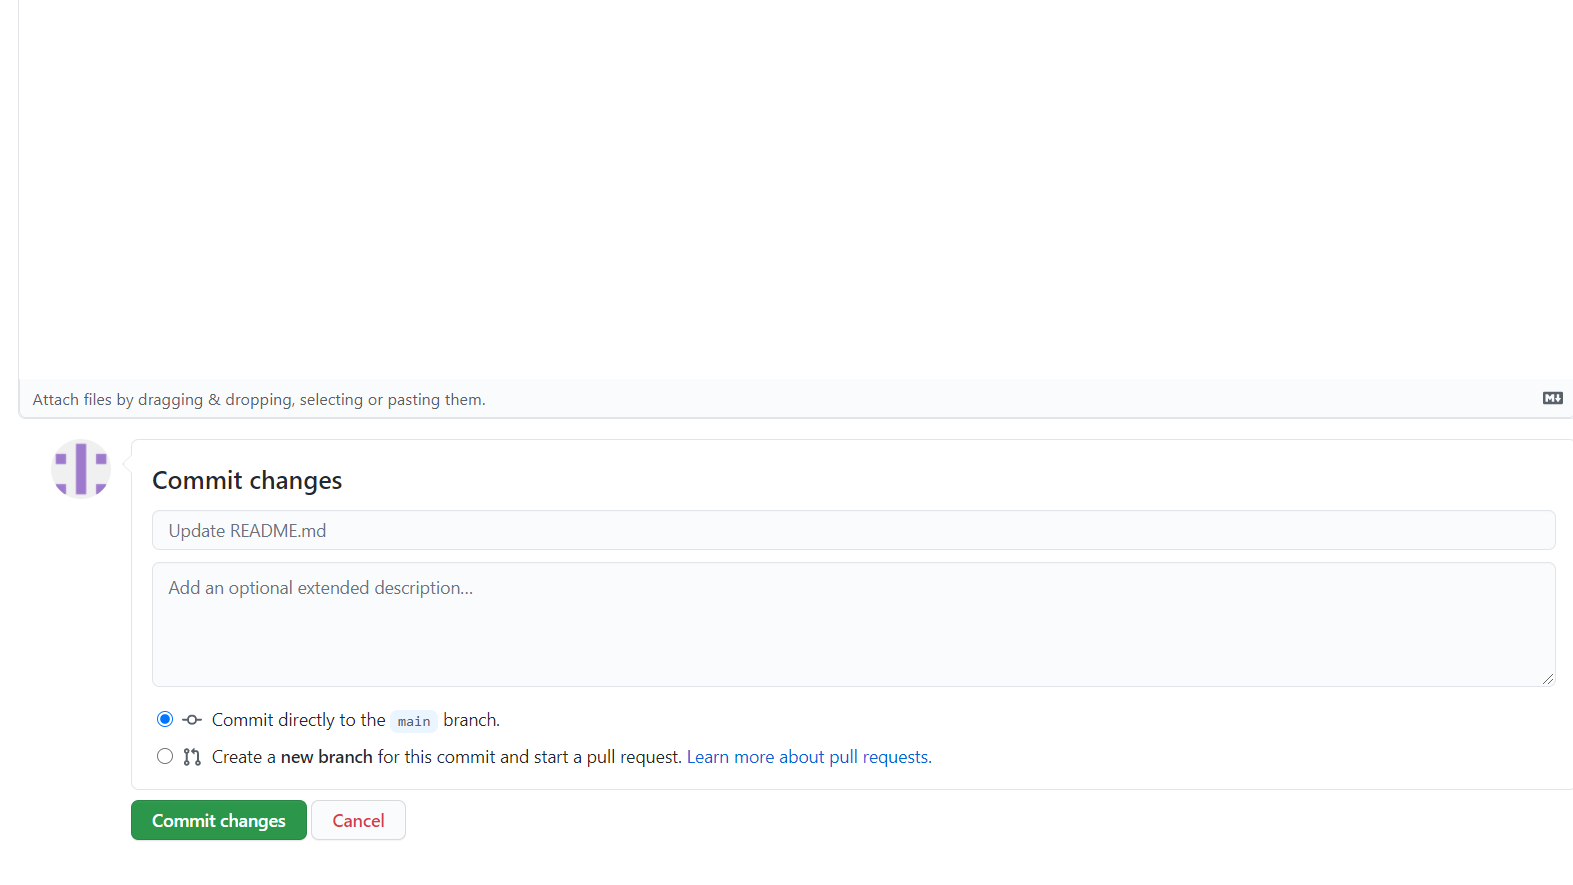
At the bottom of either selection, you will also see options for “Commit changes”. Commits, pushes, pulls, and other actions that you can take using GitHub are the topics of many other tutorials, especially because they often are used through the Command Line, which is not strictly on the GitHub site. For more information about the Command Line and using these Git functions, check out this tutorial or this one. That being said, I like to think about commits as a change that we are making to something in the repository. If other people are working on the same project as you, it’s probably a good idea to let them know what changes you’ve made so that they can stay in the loop, or change your changes later on. So, the top line that currently reads “Update README.md” is the basic description that is auto-generated for our change. This is helpful for someone if they do not need to know what you changed in this file, but if they do, then you may want to add a more detailed description in the box below it. Lets leave the blue selected button alone for now, but we’ll touch on what “Commit” means in the next section. Finally, click “Commit changes”. You’ve added a file to the repository!
Collaboration with GitHub
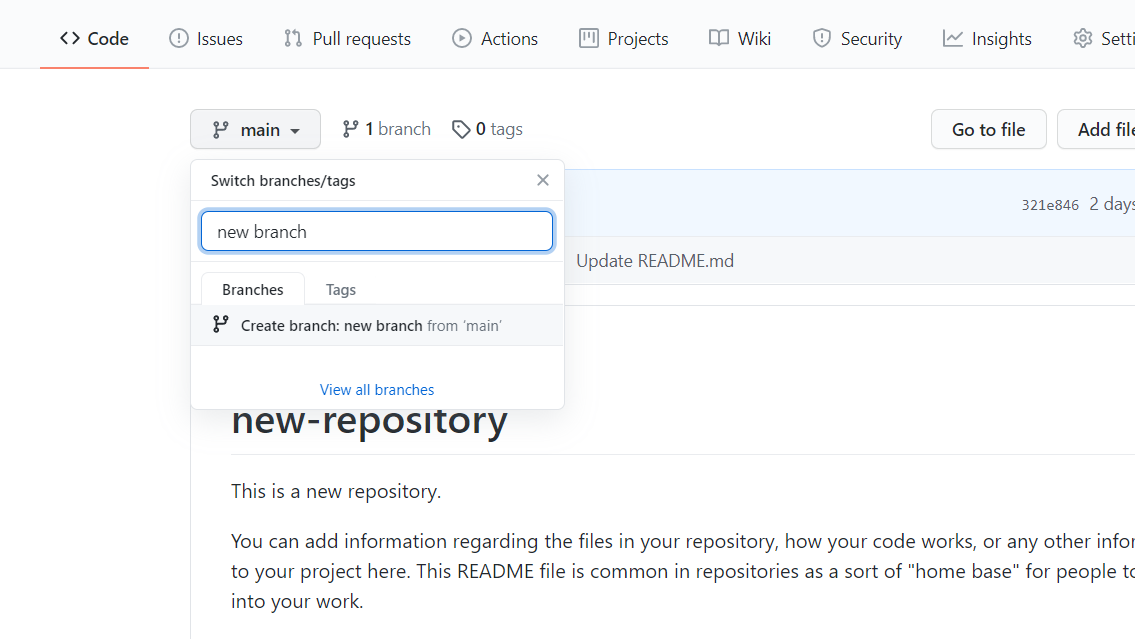
One of the most powerful parts of GitHub, and one of the reasons it is so widely used, is its workflow. GitHub uses a “branch-based” workflow, meaning that everything is centered on different branches of the project. There is a main branch, which is where you automatically start working once you create a new repository. Think of the main branch as a tree trunk that you can build off of. If you or another collaborator on the project want to try out some changes, say, to test some new code you wrote, but don’t want to make changes to the main branch yet, you can create a branch off of that main “tree trunk”. Then, any changes to that branch will be saved and accessible to you and others, but it won’t change the main project branch yet. This allows for users to collaborate both on the main project while also trying out more individual ideas without changing the overall structure. To create a new branch, select “main”, enter the name of the branch you want to create, or find, and then click “Create branch”.
As you make changes, you will commit them to the branch you are working on (save the change and keep a running record of the changes made so far), make pull requests (which allows for peer review and collaboration on the changes you’ve been making), and finally deploy and merge your changes back to the main branch, so now everyone can take advantage of the work you’ve done! This workflow is a bit confusing to get a grasp on (again, check out this helpful visualization!), but once understood, it is what makes GitHub such a valuable collaborative tool in the field of DH.
Henrie, thank you for the brilliant tutorial! I have used GitHub a little in the past but mostly just to download programs. I have heard some horror stories about people who have tried to merge their branch back into the main branch, and accidentally deleted some of their work. Do you know of any tips to avoid this or troubleshooting suggestions for when this happens? Thank you for the great information!
Great tutorial, Henrie! Your tutorial was clear and easy to follow! As Grace already commented, I would also like to know about merge conflicts and how to troubleshoot!
This is a very good and detailed tutorial for GitHub. I use GitHub quite frequently and I felt your descriptions were quite accurate.