One of the most important things I’ve learned from this class is that Digital Humanities requires collaboration. When I first was making my house model using SketchUp many months ago, I wished that I could have support in creating the more complicated, minute details of my project. Luckily, I learned through this process that SketchUp has a feature that allows you to access an online, 3D warehouse with elements that previous SketchUp users have created previously. I can imagine this tool being useful in so many scenarios, as it streamlines the building process for new SketchUp users and allows more experienced creators to access and build off of each other’s work. In my experience, this tool is most helpful to add aesthetic details to an already complete project. This tutorial will show how to access the 3D warehouse and edit the size of these downloaded elements!
First, open a SketchUp document. In this case, I used my house from the beginning of the course.

Click on the forth icon down from the tool bar on the right side of the screen, next to the red arrow. This will open up the 3D Warehouse. If you are a first time user, you may need to sign an agreement form before continuing.
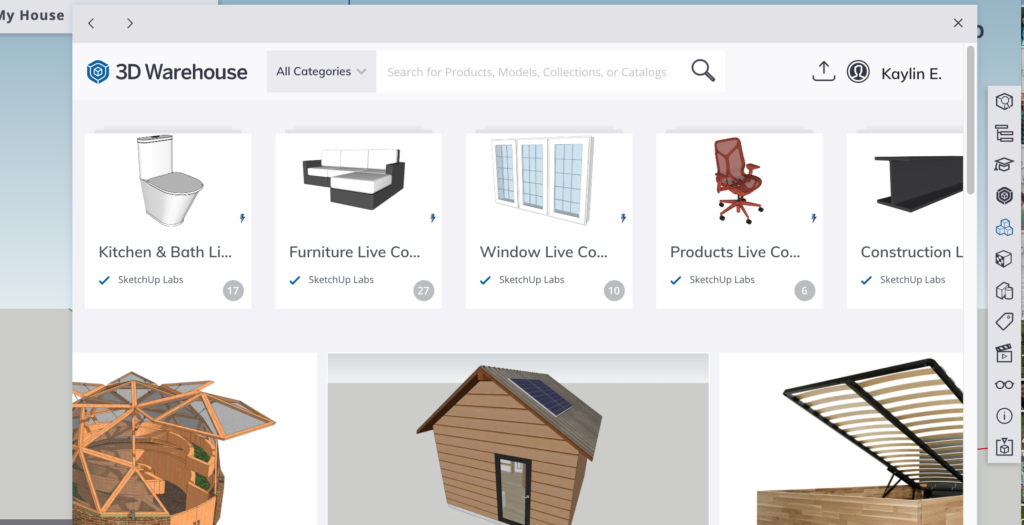
Your 3D Warehouse screen should look similar to this window. Now, you can look for a specific product or design by searching in the search window next to the 3D Warehouse text. In this tutorial, I am going to be setting up a pool in the yard of my house.
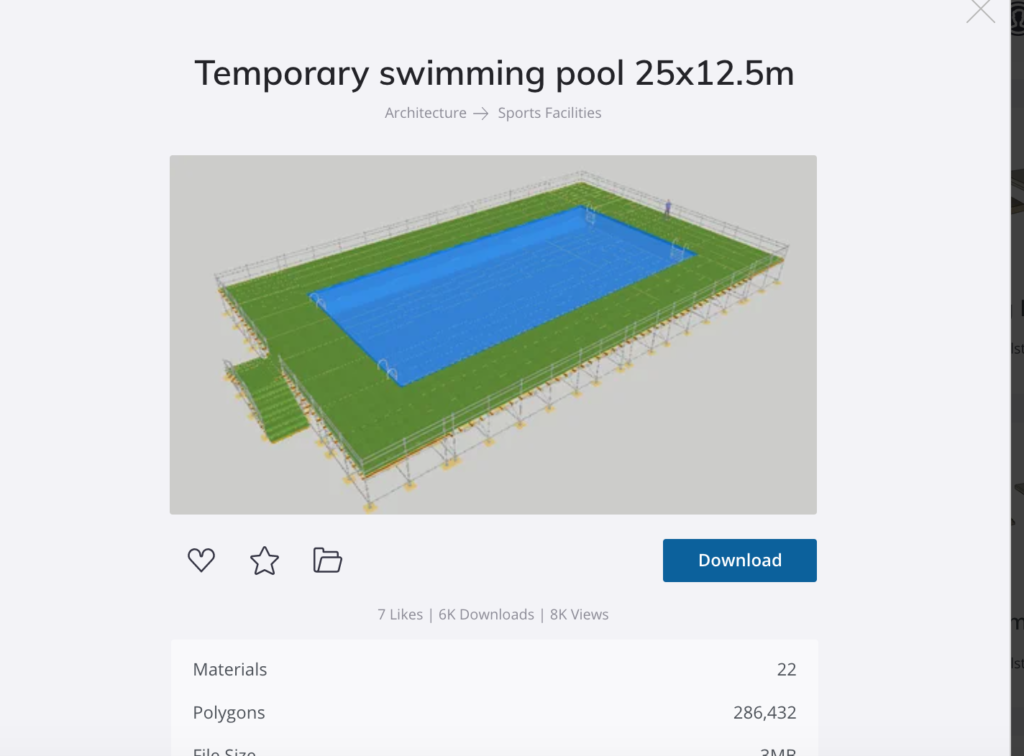
Once you find a design you want to import, hit the download button. It should then automatically paste this element into your design window.
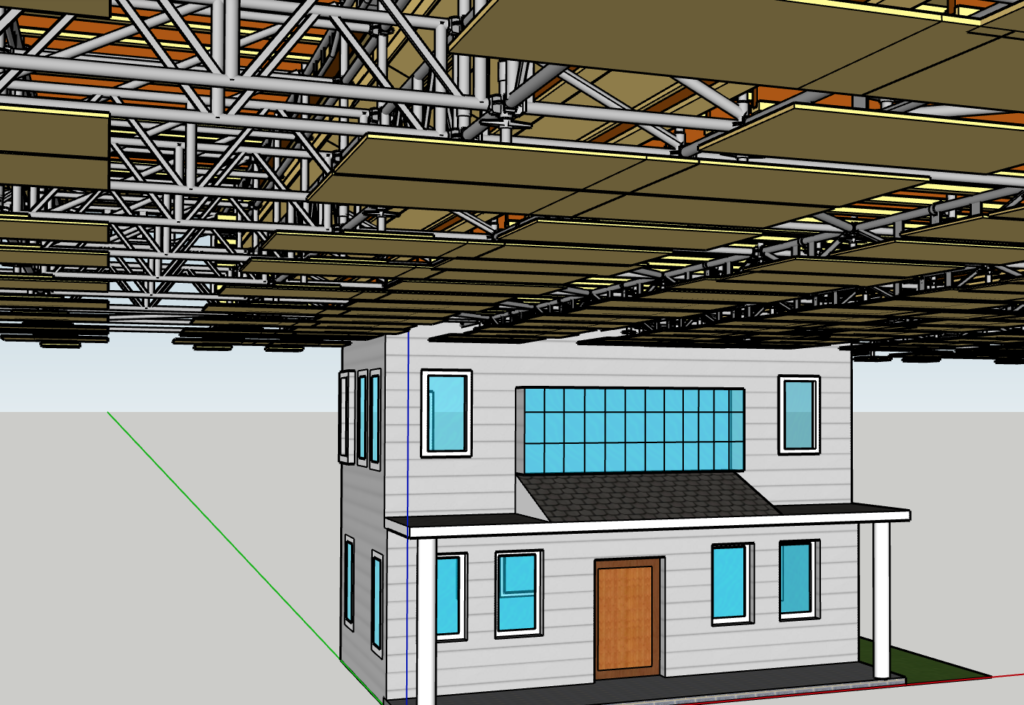
The downloading process is really straightforward! However, the design you select won’t always fit perfectly with the rest of your SketchUp model. For example, when I downloaded the pool, it was immediately overlaid over my house and is significantly larger.
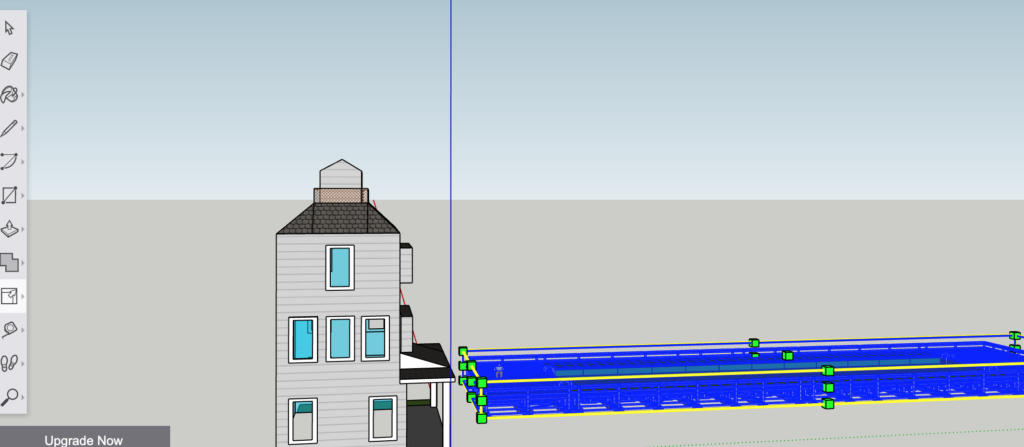
To edit the model, select the whole thing until it is lit up bright blue (downloaded elements should be saved as an entity so the whole thing should be selected). Use the Scale tool on from the toolbox on the left side of the screen (which is lit up white in the picture below). When you select the model using this screen, the corners of your object should light up green like in the picture below. Slowly drag the corners in until it is at its desired size and then unselect the object.
An example of a final product is shown below. Here you can see that the pool is reasonably sized in comparison to the house and I have this new exciting element in my project that I don’t necessarily have the technical skills to make.

All items within the 3D Warehouse can be used to brighten up projects in a easy and straightforward way!
Other Resources for Resizing in SketchUp and Using the 3D warehouse:
https://help.sketchup.com/en/sketchup/scaling-your-model-or-parts-your-model
Kaylin, thank you for explaining how to use the 3D warehouse. Your steps are very clear and very well thought out. Thank you for explaining how to scale objects, as I was not aware that this was possible. I appreciate that, using the digital warehouse, I can find almost anything I would want to include but may not be able to design myself. I can see this helping to create scenes from the present and future.
Hi Kaylin, great tutorial! I remember when I was building my SketchUp house at the beginning of the term, I really struggled with making windows so I wish I had seen your tutorial and known about the warehouse back then! It was really fun to add small details to my house and it made it look a lot more realistic. Thanks for sharing, it was super helpful!