Want to create a simple 3D model but is frustrated with clicking the wrong dots and selecting the wrong shapes while using SketchUp? I have got an alternative tool for you to try with! Onshape is an online tool that allows you to create 3D CAD drawings with relative ease (and apparently data management as well? Must be a new feature). I actually learned this in High school and have find it quite helpful for various projects. Onshape has education and free plans that allow you to create projects viewable on public but at no costs, which is great for broke college students like me.
Step-by-step to Create a Simple 3D Model
Step 1: Creating a Project
After creating an account and logging in, you should see your home page that looks like something like this (but with less existing content):
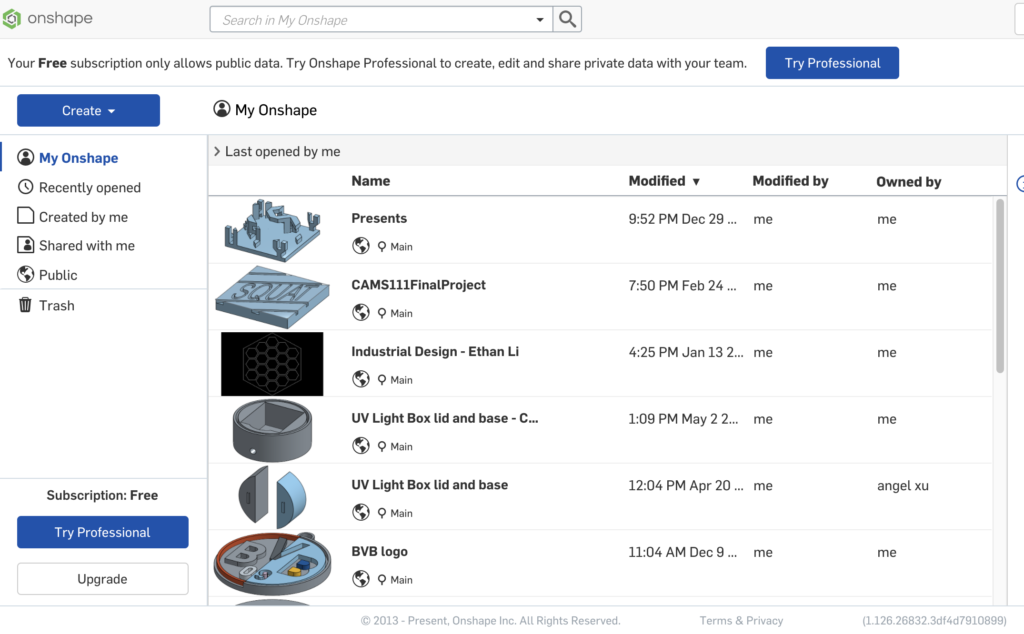
Click the big “Create” button on the top left, choose “Document” from the drop-down, give it a name, and you are all set to start sketching!
Step 2: Create a 2D sketch on a plane
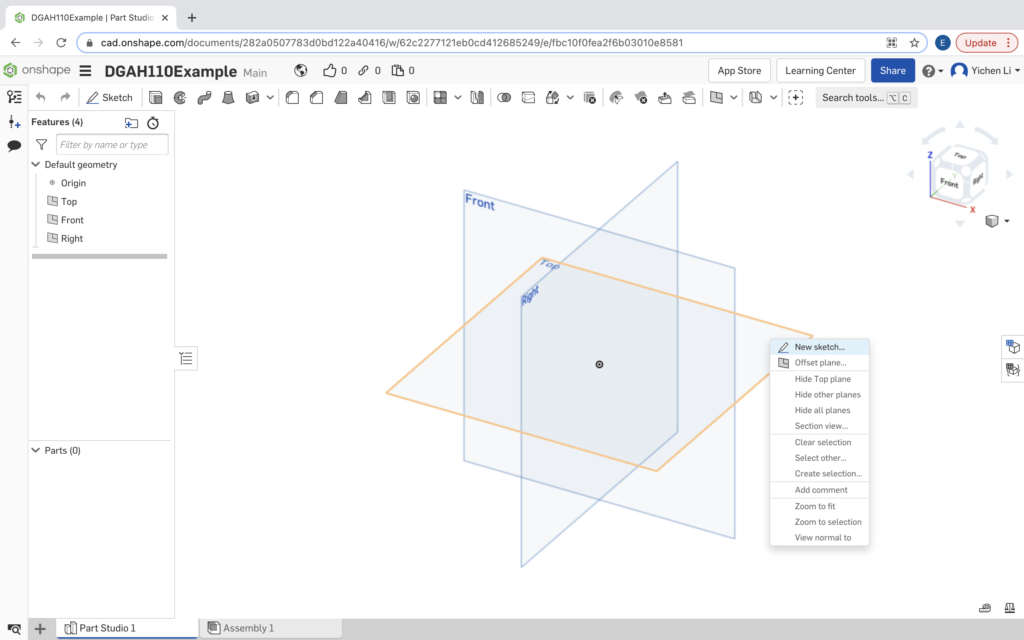
To start sketching your 3D object, you want to first select a plane and create a 2D sketch. The easiest way to do this is to right click on one of the pre-existing planes and select “New sketch”. You can adjust the angle of the display by dragging around the right click button or by navigating the camera-angle-cube-thing on the top right corner of the screen.
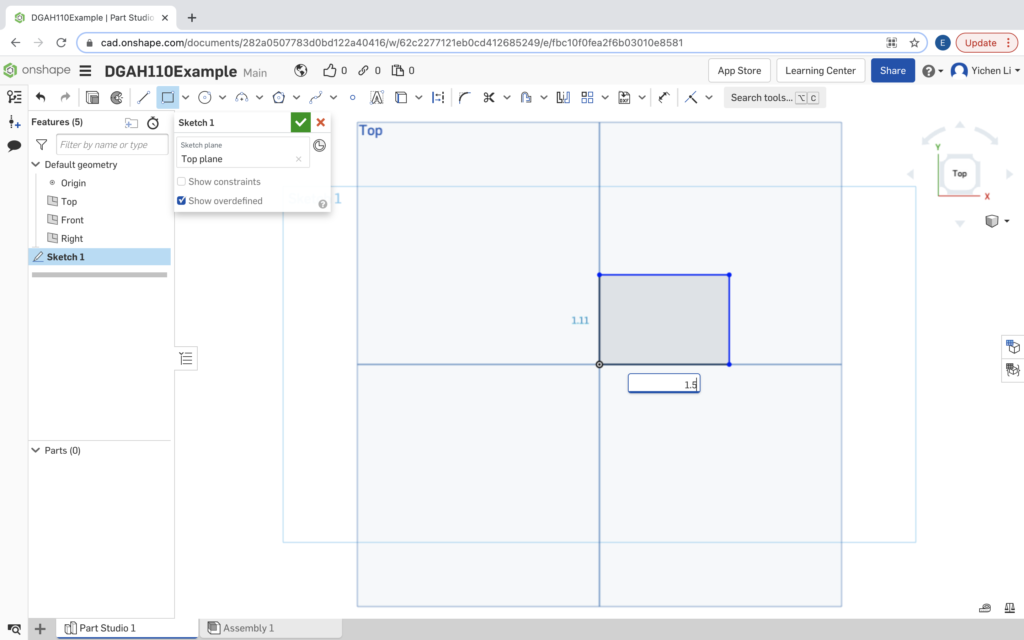
While working on your sketch, there are many 2D tools on the tool bar for you to navigate and choose from. Just as a demonstration, I drew a simple rectangle using the rectangle tool. You can adjust the length and width of the rectangle by dragging the shape while drawing it or by editing the length of each line later on.
Step 3: Extrude your 2D object to 3D
Once you are satisfied with your initial 2D drawing, you can turn it into a 3D object through various ways, with extruding the sketch linearly being the easiest to learn. Simply right click on the rectangle, and select “Extrude”. Drag your camera around and you should see something like this to show you the expected result of your extrusion:
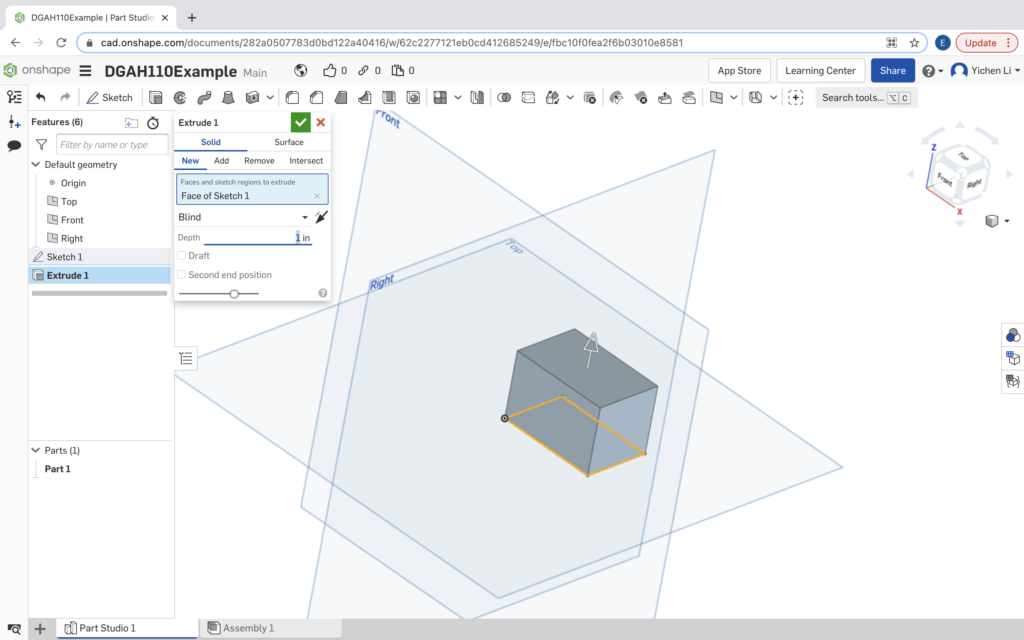
Of course, you can adjust the depth of the extrusion both now or later. It is probably best to select the exact depth now to prevent future adjustments from causing problems with other drawings you make on you object after the extrusion.
Step 4: Modify your 3D object
After having the initial 3D object created, there are also countless ways to manipulate it using the 3D object tools on the tool bar. In addition, you can also select a surface of the object you created and make a new sketch plane. You can use tools to set reference lines and draw shapes like this circle on the surface of the object you extruded earlier.
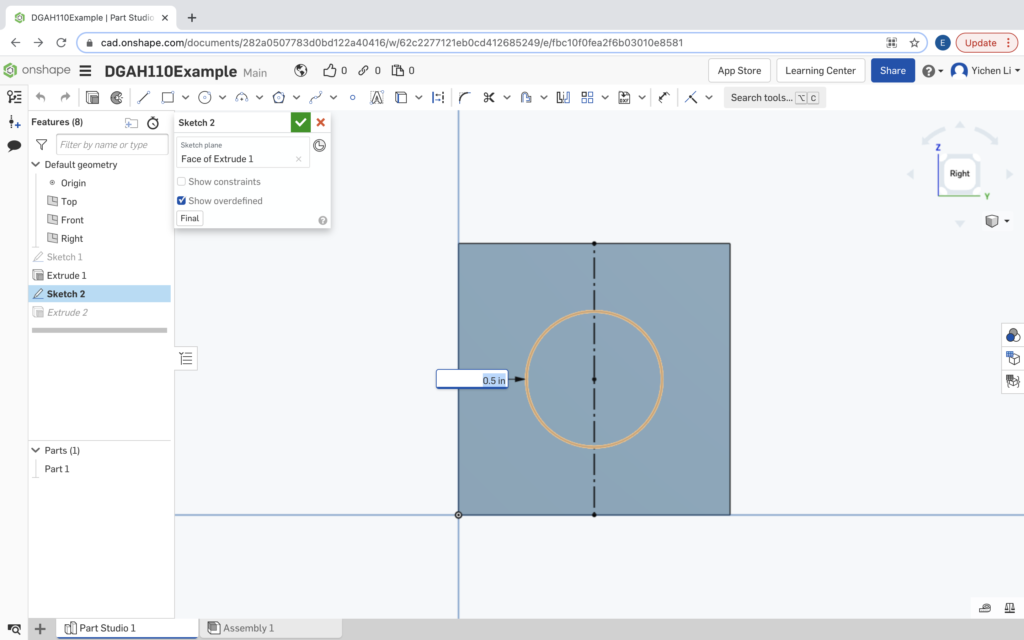
From there, you can once again extrude the circle to make it 3D as well. Because you drew the circle on the face of an existing object, you can choose to either add onto the object or to remove material from it.

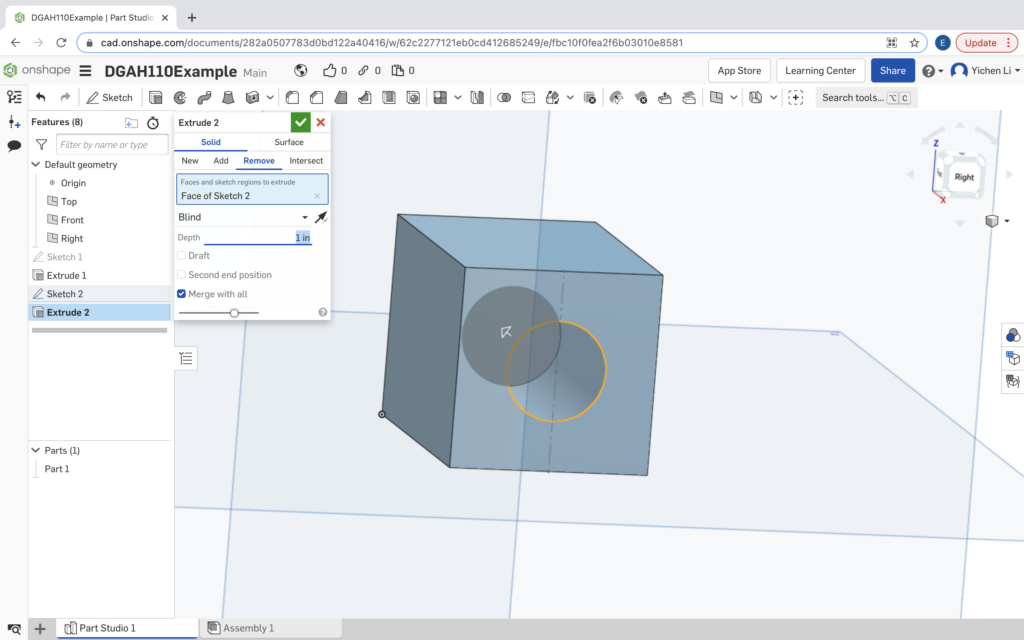
You can even remove all the way through by changing the depth of extrusion to make this hollow square-shaped-short-tube-thingy.

There are way more ways to decorate and reshape your objects, but for the sake of beginner-friendliness for this tutorial, I think I’m going to stop right here and go ahead to export this object.
Step 5: Export your object
When you are satisfied with your 3D drawing, you can export the file by right clicking on the Part Studio tab on the bottom and select “Export…”. The following window should appear:
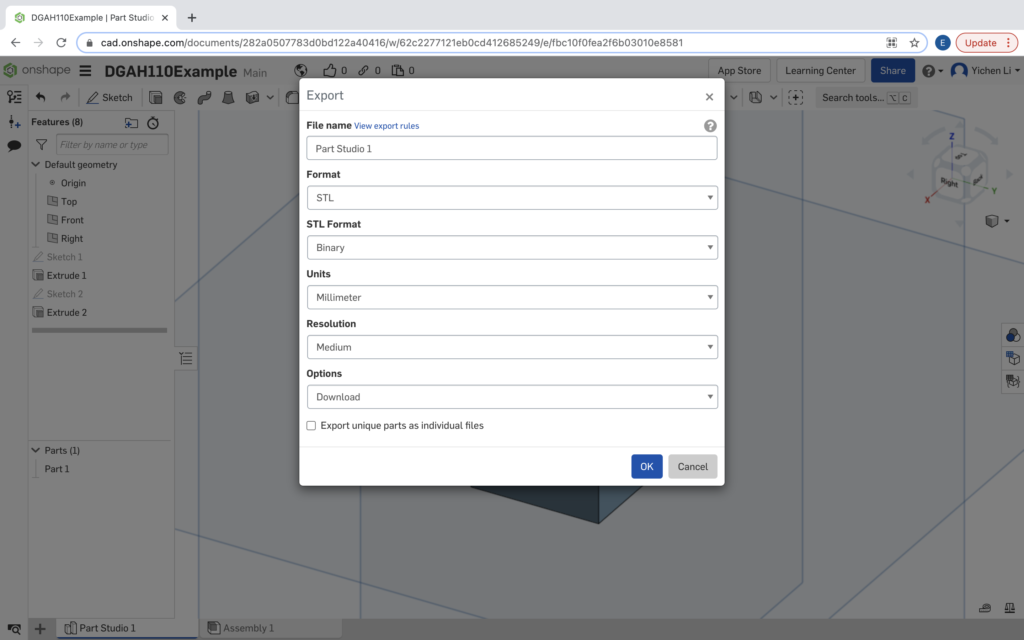
Adjust the options here to your heart’s desire! The STL format can be used by 3D printers to print your 3D object out. Just make sure you have the right units (I’ve learned from my mistakes) before click “OK” to download your exported file.
Hungry for More?
Onshape comes with a Learning Center page that contains a range of tutorials to help you with improving your 3D modeling skills by browsing the resources there. You can also find some more old-fashioned documentation style resources here to look at while navigating the many possibilities Onshape offers.

Thanks for this tutorial, Ethan. From my brief poking around in Onshape, it already seems more intuitive to me than SketchUp. I was wondering if you have any thoughts on if/when SketchUp might be more effective? It looks like most of your projects are relatively small-scale — could SketchUp be useful for bigger modelling?
Super cool BVB logo too 🙂